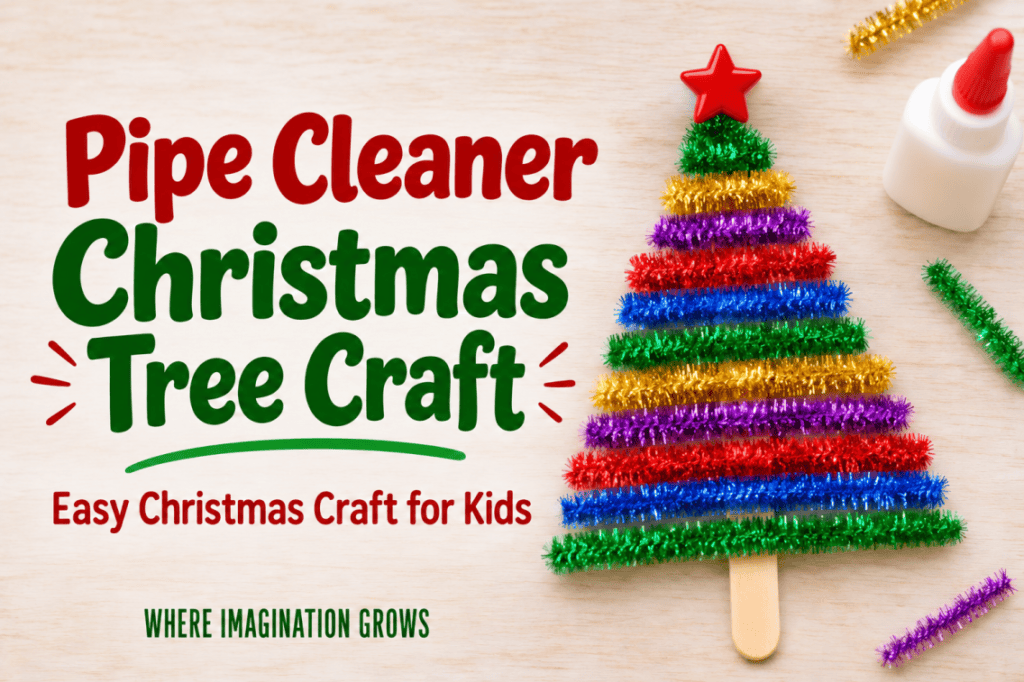
Looking for an easy Christmas tree craft for kids? This pipe cleaner Christmas tree is a simple holiday project made with pipe cleaners, glue, a craft stick, and a star bead. Children arrange the pipe cleaners into a tree shape, glue them in place, and add a star at the top.
I first made this craft with my daughter and the children in my home daycare. They were around two to three years old and enjoyed choosing the colors, arranging the branches, and squeezing on the glue. We talked about the shape of a Christmas tree before we started, then laid out the pipe cleaners in a triangle before gluing them onto the craft stick.
This is an easy Christmas craft for toddlers and preschoolers to make with adult help. The steps are simple, and children can make their trees look different by choosing their own colors and arranging the branches in their own way.
Materials for a Pipe Cleaner Christmas Tree
- Pipe cleaners (we prefer the sparkly ones, but regular green is fine too!)
- Craft stick
- Glue
- Star beads
We used colorful, sparkly pipe cleaners and star beads. Use whatever colors you have on hand. Green pipe cleaners make a traditional tree, while metallic or multicolored ones give each tree a festive look.

How to Make a Pipe Cleaner Christmas Tree
1. Cut the pipe cleaners
Cut several pieces of pipe cleaner in different lengths. The longest pieces will be the bottom branches, and the pieces should get shorter as you work toward the top of the tree.
An adult should cut the pipe cleaners and check the ends. The cut ends can be poky, so keep them turned away from children.
2. Arrange the branches
Lay the pieces on the table in a triangle shape. Put the longest piece at the bottom, then place the shorter pieces above it. Leave a little room at the top for the star.
Before gluing, invite your child to help decide where each piece should go. You can talk about how the tree gets wider at the bottom and narrower at the top.
3. Glue the pipe cleaners to the craft stick
Place the craft stick beneath the arranged pipe cleaners. Help your child glue each piece across the stick, keeping the pieces in the same order.
It takes a good amount of glue to hold the pipe cleaners in place. This makes the project a good fit for children who enjoy squeezing glue. If a piece shifts, gently move it back into place before the glue starts to set.
4. Add the star
Leave a little space above the top branch and glue a star bead at the top of the tree. Let the project dry flat before moving it.
For a faster-drying option with older children, an adult can use a glue gun. Keep hot glue and the glue gun out of children’s reach.
\
Tips for Making This Christmas Tree Craft with Kids
Make the pieces before inviting children to the table. Cutting the pipe cleaners ahead of time makes setup easier and lets children focus on arranging and gluing.
Let children choose the colors. A tree doesn’t have to be all green. Offer a few colors of pipe cleaners and let each child create a pattern or choose freely.
Use plenty of glue. Pipe cleaners can lift off the craft stick if there isn’t enough glue. Help children add extra glue where the pieces meet the stick.
Let the tree dry completely. Keep it flat while it dries so the branches and star stay in place.
Choose age-appropriate decorations. Star beads are small and can be a choking hazard. Closely supervise children and keep beads away from children who may put objects in their mouths. For those children, an adult can add a paper star after the rest of the craft is dry.

What Children Practice
This Christmas tree craft gives children a chance to practice arranging pieces, choosing colors, and using their hands to squeeze glue. As they place the branches, you can talk about the triangle shape and compare the different lengths.
The finished trees can be displayed as holiday decorations. If you want to hang one, attach a lightweight ribbon to the craft stick after the glue has dried.
Frequently Asked Questions
What kind of glue works best for pipe cleaner crafts?
Regular school glue works for this craft, but it may take time to dry. Use enough glue to attach the pipe cleaners to the craft stick, and leave the tree flat until everything is secure. An adult can use a glue gun for a quicker hold, especially when working with older children.
Can toddlers make this pipe cleaner Christmas tree?
Toddlers can help arrange the pieces and squeeze glue with close adult supervision. An adult should cut the pipe cleaners and handle any small decorations. Skip the star bead for children who may put small objects in their mouths; an adult can add a paper star instead.
How do you keep the pipe cleaners from falling off?
Use a generous amount of glue where each pipe cleaner touches the craft stick. Leave the project flat until the glue has dried completely. If the pieces keep shifting, an adult can secure them with a glue gun.
Can I use different colors of pipe cleaners?
Yes. Green is a classic choice, but colorful or sparkly pipe cleaners work well too. Children can use one color for the branches or make a pattern with several colors.
Can you hang the finished tree?
Yes. Once the glue is completely dry, tie a lightweight ribbon around the top of the craft stick to make a hanger. Check that the branches and star are firmly attached before hanging it.

More Christmas Crafts and Activities for Kids
- Mason Jar Christmas Tree Luminaries
- Glittery Christmas Tree Collages for Toddlers
- Christmas Tree Ornament Craft for Kids
- Christmas Songs and Fingerplays for Kids


Looking for more crafts and activities? Check out our index for 100+ kids’ activities! Find activities by theme, materials, skills, age, and much more!
So sparkly and adorable! I love it!
I love the sparkly pipe cleaners you used – adds some nice color to the tree!
Thanks Emma!